Deliberate processes to identify and remediate the problem can yield high-quality products and keep patients safe.
Shane Vandekerkhof, RJG

(Image courtesy of RJG)
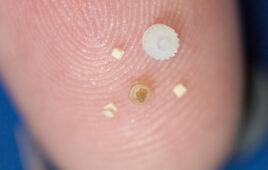
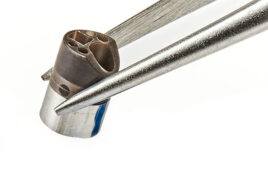
Short shots are among the most common and visually obvious quality issues most molders face, but they can cause fatal flaws in medical devices.
Imagine if a luer lock connector was short. You run the risk of air being introduced into a vein, which could cause death. Even if the medical staff caught it before the patient was harmed, how can they be confident that all the parts they have in inventory are not the same way? Do they stop the procedure to check each part? What if it was an emergency that could be fatal if the procedure is paused while the product is evaluated?
The risk is too great, so it’s vital to ensure a good, robust process is in place to prevent short shots. So how do we do that? And how do you troubleshoot them when they do occur? Let’s start with what causes them in the first place.
What causes short shots?
A short shot occurs when a plastic injection-molded part does not completely fill out — a portion of it is missing. A few issues can cause short shots, and the fix is not always straightforward. Issues may include:
- Poor venting.
- Material variations.
- Improper machine settings.
- Blocked gates.
- Mechanical failures.
It’s often hard to pin down which issue you’re battling and there are just as many fixes, depending on the root cause of the problem. But the best-case scenario is avoiding them altogether.
Prevention is key
Prevention methods range from equipment to processes to material. Here are five of the most common fixes:
- Proper venting — If vents are crushed or non-existent, air can’t escape, causing short shots.
- Proper fill volume — Always ensure that 1st stage (or fill) is similar to the setup sheet. If there is not enough fill volume, then the pack pressure can’t complete the fill and pack out the part.
- Hold time — Producing a part with the hold time off, even with the hold pressure on, may produce a part with sink marks and possibly short shots. An Injection Integral PSI alarm set on a process control system can catch this problem.
- Pack-and-hold pressure —As the material’s viscosity increases, indicating a thicker plastic, it gets harder to push and harder to transfer the plastic pressure to the end of the cavity during the pack-and-hold phase. You need enough pressure to complete the fill and pack out the part.
- Pressure-limited process — If your process does not have enough injection pressure or the injection pressure limit is set too low, the machine may not be able to inject the plastic at a constant velocity when the viscosity increases too much. It is good practice to have your pressure lowered from maximum to act as a safety net, but you must still have sufficient injection pressure during a good production cycle.
How do you troubleshoot short shots?
First, turn off second-stage pressure and time and make what is referred to as a fill-only part, as seen in this video. This will give you an idea of the flow pattern of the material inside the cavity and help with the troubleshooting process.
The goal is for this part to appear to be 99% full with no second stage being applied. If the part is significantly smaller than that, start the root cause analysis of the problem:
- Verify the machine settings are correct by comparing them to the process setup document.
- Make sure that there are no mechanical problems.
- Check for foreign material that could be blocking the gates and impeding flow into the cavity.
- While the machine is down, wipe the mold surface and vents a good wipe down to remove clogs.
- If everything seems to be in good working order, the problem could simply be material variation. Add material to the cavity.
- Adjust shot size to achieve 99% full. You can view the procedure here.
- Put back the second stage pressure settings and compare the parts to the target part weight.
- If the short is still present, or the part is underweight, increase the second-stage pressure to drive more material into the cavity. This should make the short disappear and bring the part weight up.
Following a systematic troubleshooting procedure allows everyone to work through the process in the same manner for the same reason to fix the problem. This will help you save costs on waste and save lives by producing high-quality medical devices.
Shane Vandekerkhof is the director of consulting and training at RJG. He is experienced in process improvement across multiple segments of injection molding, including medical.
The opinions expressed in this blog post are the author’s only and do not necessarily reflect those of Medical Design and Outsourcing or its employees.


